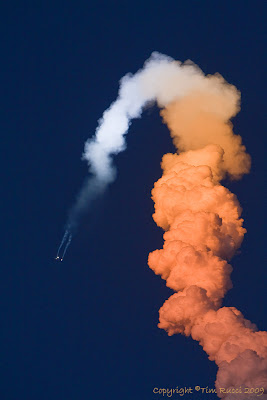
We woke up Sunday to beautiful weather that made up for everything we had gone through the previous day. It was sunny yet cool, with deep blue skies and puffy white clouds - perfect weather for anything outdoors. We had taken advantage of the free time in the morning to visit the Jupiter lighthouse, when normally we would have been traveling to a different venue for the day's game.
We were glad to see that many of the Cardinals regulars were in the lineup today, unlike what we had experienced yesterday. I had hoped to get some decent photos of Albert Pujols and others, so there should be a chance for that at least in the early innings.
With camera in hand, I'm drawn to baseball and other sports, because I am always trying to get that perfect shot - the one I feel would be worthy of appearing on the cover of Sports Illustrated or some other publication. But usually those shots come only when you are really into the game. These are times when you check out the situation and ask yourself where the next play is likely to be. Is the batter right-handed or left-handed? Will the ball likely go to the left side or the right? Which fielder is likely to make the play? Will there be a play at 2nd base such as the pivot for a double-play? And for those times when you guess correctly you need to have the proper lens and correct settings, and also be ready ahead of time if you hope to capture the shot you envision.
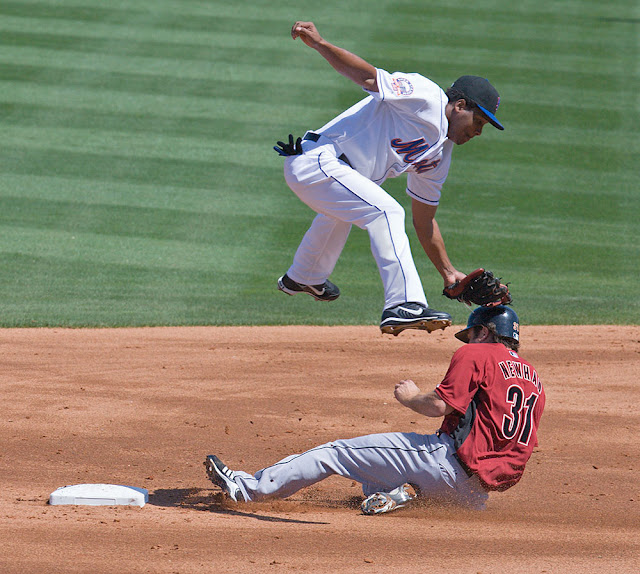
I love to get the shot of a base runner sliding under the leaping shortstop, who has gotten the throw and gone airborne while in the process of making the relay to first to complete a double play. I've gotten several variations of those over the last couple years, and it always feels good to capture that action. It usually is best when anticipating such a shot to pre-focus on the area where the action is expected to be, and hold the focus lock so that you will start out with a well focused image. Another shot I have not yet gotten is one of an infielder leaping to snag a line drive that would have otherwise gone over his head and into the outfield. I've had several tries where I cut off the glove hand, which ruined the shot. If you haven't anticipated the shot and set up for it before hand, you'll surely miss it when it does happen.
In this photo from last year, during a stealing attempt Mets shortstop Anderson Hernandez takes the throw and leaps high to avoid the sliding runner while attempting to make the tag. It would have been a great play but the ball came loose and went into center field, so the runner was safe.
Even with a fast camera, it's always a challenge to time the release of the pitch when attempting to capture a good photo of the pitcher. I personally like position myself at an angle as close in toward home plate as possible for this shot, so the perspective is similar to what the batter sees. In some parks, that's not possible unless you are on the field because when viewed from the seats there is a protective screen behind home plate that gets in the way. I usually try to fire from just outside the screen. I find that it's best to fire a couple quick shots (2 or 3 at most) rather than spray and pray with a long burst. And sometimes I just fire one shot on successive pitches until I time it right.
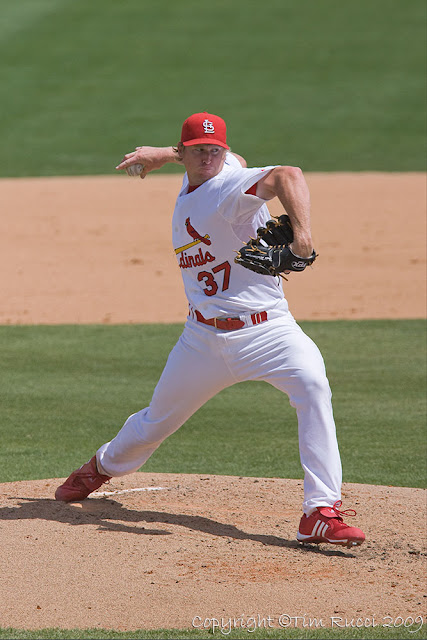
The shot is more appealing if you are able to capture the expression on the face of the pitcher, and also time it at just the right time to show the best action. Often a good shot can be had prior to the release if there is something else in the photo that shows emotion. I like this one because of the expression on the face of Cardinals pitcher, Todd Wellemeyer. Below is another photo showing his follow through, viewed from the opposite side.
The more I think about it, the more I realize that it's very difficult to get a shot right at the release, that also captures a good expression on the pitcher's face.
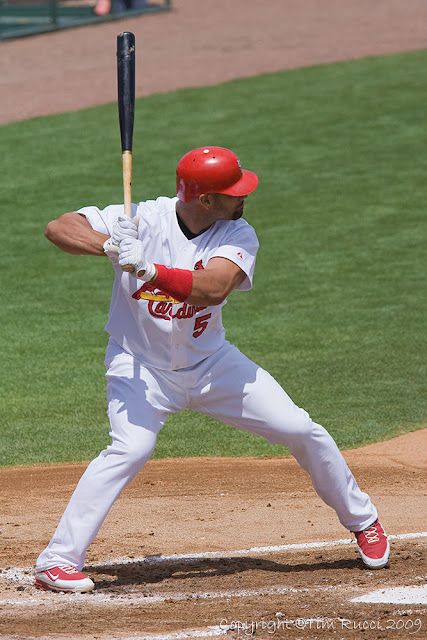
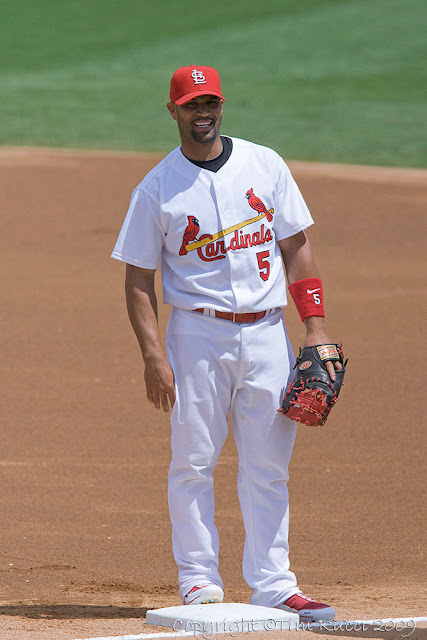
Since Albert Pujols is probably the most popular Cardinal's player, I naturally wanted to try and capture some memorable images of him. There are several different attempts below showing him at the bat and during a swing, and also standing at 1st base.
For baseball photography the first challenge is positioning myself to get close enough to fill the frame with the player, but at the same time framing the shot so that the bat or some part of the player's body is not cut off from the photo during the swing. Using a prime lens (fixed focal length), it's sometimes difficult to find a good position to shoot from that gives the best angle for the intended shot, without having obstructions in the way. I was using a Canon 300mm f2.8L IS lens, and for some shots, I added a 1.4x extender. Not having on-field credentials for spring training baseball, we were constantly having people walk in front of us while we tried to shoot from the standing-room only area of the aisle. And there's nothing that can be done about that.
Once you get into position, the next thing to do is make sure you have chosen a proper aperture setting to get enough depth of field for the shot you intend to make. I usually calculate it before hand, but I always carry my PDA which has a depth of field calculator, so I can also check on the fly if a situation arises that I had not expected. With baseball, you need a lot more depth of field for a pitcher's delivery than you need for a batter's swing, because the pitcher probably covers a distance of about 5 or 6 feet from the time he stands on the rubber until he finally releases the pitch. In other words, if you shoot wide open at f2.8 and lock focus on him while he stands on the mound, he will no longer be in sharp focus with those settings at the point where he lets go of the ball. I have tried using AI Servo focus to track the movement of the pitcher, but seem to get better results pre-focusing on the position of the pitcher during a prior pitch, and then holding that focus lock and waiting to fire on the next pitch when he is in the same position.
A professional level DSLR can track a moving subject, but it needs some data to get started in order to be able to predict where the subject will be for each successive shot. Short movements like those of a pitcher winding and throwing a pitch may not provide enough data fast enough to accurately predict where the pitcher will be at the next shot in every case. It is usually recommended that you track a moving subject for a second or two in order to give the microprocessor in the camera a chance to calculate the distance to the subject, and how quickly and how much it is changing. There's not really time to do this with a pitcher's delivery because the ball is on the way to the plate faster than that.
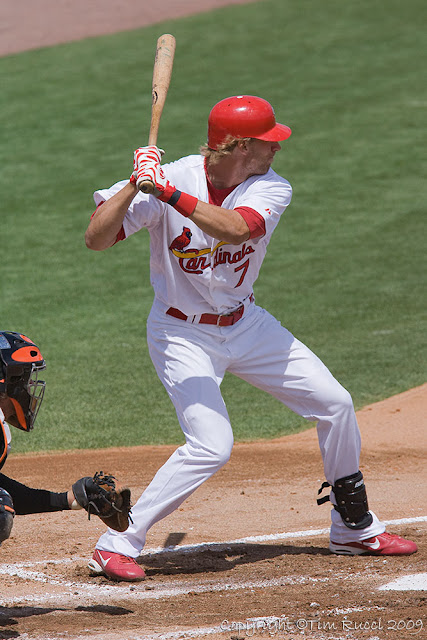
This is why using a little narrower aperture makes sense. It gives a wider depth of field and thus provides a larger margin for error. One way to eliminate this problem is to shoot the pitcher from the side instead of the front, since the distance does not change during the delivery from that angle. But that's a different photo all together. I did that a lot on Saturday because the light was low after the rain, especially as it got later. And I was shooting at f2.8 just to get enough shutter speed to freeze the action. I like to get shutter speeds of 1/2000 or higher, and I try to never go below 1/1500. Late Saturday afternoon, I was only getting about 1/800 wide open at f2.8 and iso 400. That was already too slow for some shots, so it was not possible to stop down the aperture and still get properly exposed, sharp photos. When photographing the batter, I would much rather shoot from center field with a long lens, than shoot from the batter's side. When you are watching a game on TV, that is usually the perspective you get. But it was not possible on this trip.
I didn't feel like I got any real killer shots this weekend, but it was a great weekend none the less, and it is nice to know that the regular season is right around the corner. Without baseball, I would not have any sports to follow during the annual withdrawal I go through when the Stanley Cup Playoffs end and before the NFL football season begins. Click here for more photos.
We were glad to see that many of the Cardinals regulars were in the lineup today, unlike what we had experienced yesterday. I had hoped to get some decent photos of Albert Pujols and others, so there should be a chance for that at least in the early innings.
With camera in hand, I'm drawn to baseball and other sports, because I am always trying to get that perfect shot - the one I feel would be worthy of appearing on the cover of Sports Illustrated or some other publication. But usually those shots come only when you are really into the game. These are times when you check out the situation and ask yourself where the next play is likely to be. Is the batter right-handed or left-handed? Will the ball likely go to the left side or the right? Which fielder is likely to make the play? Will there be a play at 2nd base such as the pivot for a double-play? And for those times when you guess correctly you need to have the proper lens and correct settings, and also be ready ahead of time if you hope to capture the shot you envision.
I love to get the shot of a base runner sliding under the leaping shortstop, who has gotten the throw and gone airborne while in the process of making the relay to first to complete a double play. I've gotten several variations of those over the last couple years, and it always feels good to capture that action. It usually is best when anticipating such a shot to pre-focus on the area where the action is expected to be, and hold the focus lock so that you will start out with a well focused image. Another shot I have not yet gotten is one of an infielder leaping to snag a line drive that would have otherwise gone over his head and into the outfield. I've had several tries where I cut off the glove hand, which ruined the shot. If you haven't anticipated the shot and set up for it before hand, you'll surely miss it when it does happen.
 |
| 39719 Hernandez |
In this photo from last year, during a stealing attempt Mets shortstop Anderson Hernandez takes the throw and leaps high to avoid the sliding runner while attempting to make the tag. It would have been a great play but the ball came loose and went into center field, so the runner was safe.
Even with a fast camera, it's always a challenge to time the release of the pitch when attempting to capture a good photo of the pitcher. I personally like position myself at an angle as close in toward home plate as possible for this shot, so the perspective is similar to what the batter sees. In some parks, that's not possible unless you are on the field because when viewed from the seats there is a protective screen behind home plate that gets in the way. I usually try to fire from just outside the screen. I find that it's best to fire a couple quick shots (2 or 3 at most) rather than spray and pray with a long burst. And sometimes I just fire one shot on successive pitches until I time it right.
 |
| 62262 Todd Wellemeyer |
The shot is more appealing if you are able to capture the expression on the face of the pitcher, and also time it at just the right time to show the best action. Often a good shot can be had prior to the release if there is something else in the photo that shows emotion. I like this one because of the expression on the face of Cardinals pitcher, Todd Wellemeyer. Below is another photo showing his follow through, viewed from the opposite side.
 |
| 62162 Wellemeyer |
The more I think about it, the more I realize that it's very difficult to get a shot right at the release, that also captures a good expression on the pitcher's face.
 |
| 62031 Albert Pujols |
 |
| 62034 - Albert Pujols |
 |
| 61937 - Albert Pujols |
Once you get into position, the next thing to do is make sure you have chosen a proper aperture setting to get enough depth of field for the shot you intend to make. I usually calculate it before hand, but I always carry my PDA which has a depth of field calculator, so I can also check on the fly if a situation arises that I had not expected. With baseball, you need a lot more depth of field for a pitcher's delivery than you need for a batter's swing, because the pitcher probably covers a distance of about 5 or 6 feet from the time he stands on the rubber until he finally releases the pitch. In other words, if you shoot wide open at f2.8 and lock focus on him while he stands on the mound, he will no longer be in sharp focus with those settings at the point where he lets go of the ball. I have tried using AI Servo focus to track the movement of the pitcher, but seem to get better results pre-focusing on the position of the pitcher during a prior pitch, and then holding that focus lock and waiting to fire on the next pitch when he is in the same position.
 |
| 61454 - |
This is why using a little narrower aperture makes sense. It gives a wider depth of field and thus provides a larger margin for error. One way to eliminate this problem is to shoot the pitcher from the side instead of the front, since the distance does not change during the delivery from that angle. But that's a different photo all together. I did that a lot on Saturday because the light was low after the rain, especially as it got later. And I was shooting at f2.8 just to get enough shutter speed to freeze the action. I like to get shutter speeds of 1/2000 or higher, and I try to never go below 1/1500. Late Saturday afternoon, I was only getting about 1/800 wide open at f2.8 and iso 400. That was already too slow for some shots, so it was not possible to stop down the aperture and still get properly exposed, sharp photos. When photographing the batter, I would much rather shoot from center field with a long lens, than shoot from the batter's side. When you are watching a game on TV, that is usually the perspective you get. But it was not possible on this trip.
 |
| 62008 Mather |
 |
| 62417 - Pickoff |
In this photo, the Orioles base runner was easily picked off at first base, but it was ruled that Cardinals pitcher Brad Thompson had balked, so the runner was awarded 2nd base.
We didn't get to see any balls hit out of the park this weekend, but the closest was probably this long fly ball hit by Rick Ankiel, that was run down and caught in the warning track by Orioles center fielder Adam Jones.
We didn't get to see any balls hit out of the park this weekend, but the closest was probably this long fly ball hit by Rick Ankiel, that was run down and caught in the warning track by Orioles center fielder Adam Jones.
 |
| 62192 Adam Jones |


